Quickstart
From zero to live data in a few simple steps: register your app, let users log in with openfeed, request consent to their banking or energy data, and fetch it through a simple REST API.

openfeed just went live. Whatever you’re building on openfeed, come ask questions, share feedback, and hear about new features first.
Join the openfeed Discord →
From zero to live data in a few simple steps — here’s how to get started with openfeed.
Before you start
We use some OpenID Connect terms in this guide. Don’t worry if you aren’t familiar with them — we link to more detailed developer articles as we go. openfeed is built on strong, open standards that are common practice for hosting secure data-integration APIs.
1. Register your application
Register your app in the openfeed developer portal. Developers self-register their own applications — there’s no approval wait to start building.
We gather a few fields to set up your secure client and describe your application, such as your website and logo. Later, you can improve your registration with screenshots to help consumers understand your app.
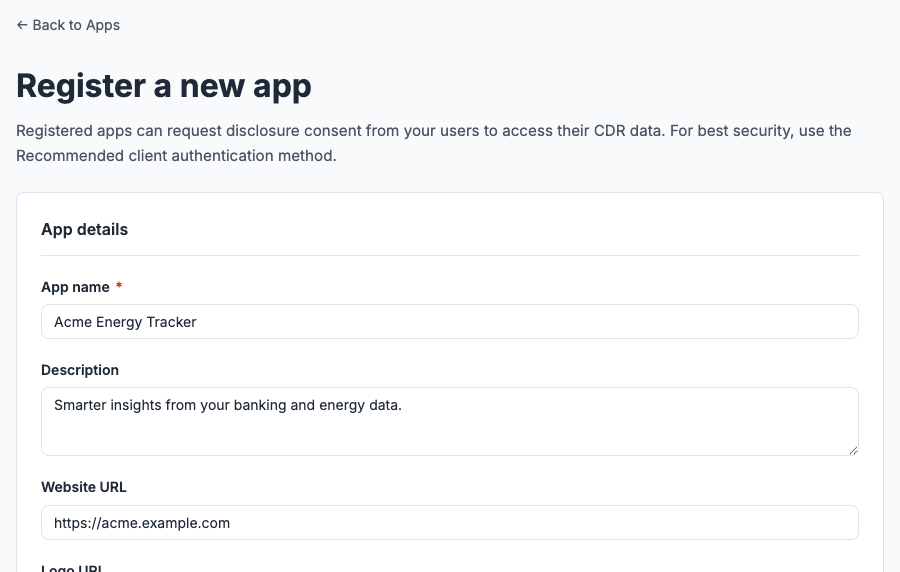
This is where you configure the secure client credentials your app uses in the later steps to authenticate with openfeed.
2. Login with openfeed
Managing user information is tricky and time-consuming. openfeed takes care of that hassle with a Login with openfeed feature: using your registered app, we securely authenticate your users for you. See Login with openfeed for how to add it.
Tip: openfeed uses the FAPI 2.0 Security Profile (an OpenID Connect standard) for strong security. We recommend choosing an OIDC client library for your implementation language, as it supports these standards for you and makes integration much simpler.
Point a standard OIDC client library at the openfeed issuer URL — it discovers everything else it needs automatically:
GET https://auth.openfeed.au/.well-known/openid-configurationYou then send the user to openfeed to sign in, requesting the openid scope plus offline_access
(so you receive a refresh token):
openid offline_accessNote:
offline_accessmay not appear in thescopefield of the token response even though arefresh_tokenis issued. This is expected — use the presence ofrefresh_tokenin the response to confirm offline access was granted.
3. Request access to data
Once you have an authenticated user, openfeed provides a simple flow to gather consent from a consumer to share their banking or energy data with you. They choose which accounts to share, and you can modify this list later if the consumer needs to change it. See Disclosure consent explained and Grant management & lifecycle for the detail.
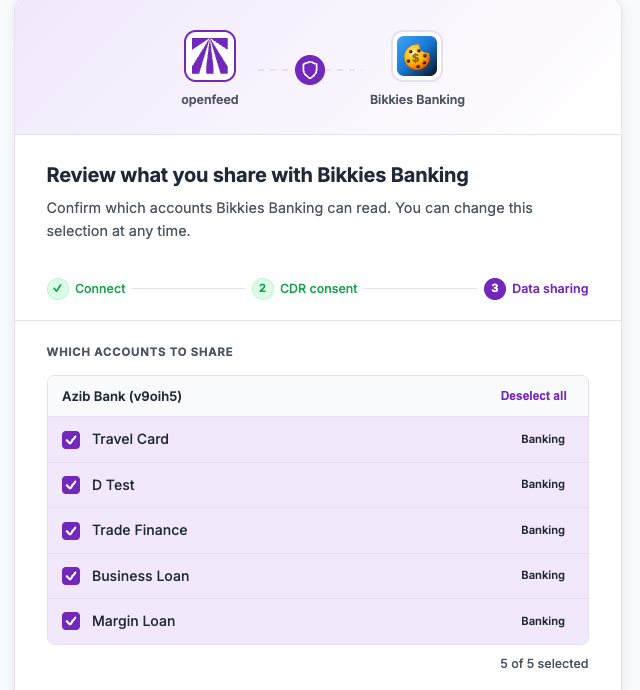
To request access, add the data scopes you need when you send the user to sign in:
openfeed-au:data:banking:read      # read banking accounts and transactions
openfeed-au:data:energy:read       # read energy accounts and usage
openfeed-au:grant:self:query       # read the grant details for a user's consent
openfeed-au:grant:self:revoke      # revoke a grant on the user's behalf
4. Fetch the data
With this consent in place, you can now query openfeed for data. We provide a simple REST API for this access, and publish an OpenAPI v3 specification that’s understood by many tools to make the integration easier. Browse it in the API Reference.
Your OIDC library attaches the security details to each request for you: the consumer’s access token, bound to your app with a per-request DPoP proof. High level, a data call looks like this:
const url = 'https://api.openfeed.au/v1/banking/accounts';

const res = await fetch(url, {
  headers: {
    // The access token, presented under the DPoP scheme (not Bearer).
    Authorization: `DPoP ${accessToken}`,
    // A fresh, single-use proof signed with your app's key, binding this
    // request to that token. Your OIDC library generates this for you.
    DPoP: await createDpopProof('GET', url, accessToken),
  },
});

const { version, data, meta, links } = await res.json();
Every response uses the envelope { version: "V1", data, meta?, links? }. Collections are paginated
with limit (default and max 1000) and offset (default 0); links.next is present only when more
records exist.
Ready to go
That’s it — with those four steps you have authenticated users and consented data flowing into your app.
From here you can focus on what makes your product great, not on the plumbing. There’s no accreditation to obtain, no per-institution connections to build and maintain, and no complex security stack to implement and keep compliant — openfeed handles all of that behind a single, simple REST API. The hard integration work is done, so your time goes into your features and your users’ experience.